Showing posts with label Old Brown Glue. Show all posts

Tuesday, August 1, 2017

WPE and OBG and ASFM return to MASW!


A French Marquetry Atelier in Indianapolis

I am pleased to be invited back for another teaching period at Marc Adams School of Woodworking.

I enjoy the atmosphere and support by the staff at MASW.  It is an environment which is full of energy and ideas.  The students all work together and many of them seem to actually live there full time.  Some of them really do.  Others return again and again to share and learn more about different and diverse aspects of woodworking.

I also enjoy meeting other teachers who are working there at the same time.  These are professional woodworkers that I read about and follow online, but, without actually teaching at the school, I would never have the opportunity to spend quality time with them.

This year I am teaching three classes, and I welcome you to check out the schedule and see if there are any openings left.

The main class is, as usual, working a full week with the "chevalet de marqueterie."  Marc has made 8 of these tools, and it is exciting to see (and hear) a full class sawing away, cutting precise elements from marquetry packets.  I should mention that in North America there are only three schools where you can have this instruction.  Paul Miller, in Vancouver, is a past student of mine and has the Canadian School of French Marquetry, with 4 chevalets.  Of course, I was the first to open such a school, the American School of French Marquetry, in San Diego.  I have currently 8 such tools, and have ordered more from David Clark, in Missouri.

David Clark has set up a business making custom chevalets, following my blueprints, and builds tools that are cost effective and precise.  His website is www.chevaletkits.com.

A few years ago I convinced Marc to also build 8 such tools and he sets them up each year in a classroom for me to use.


Waiting for Students to Arrive

All instruction is following as close as possible the lesson plan developed by Dr. Pierre Ramond, who taught for decades at ecole Boulle, in Paris.  I was fortunate to have studied under Pierre for most of the 1990's, and have dedicated my teaching career to continuing his efforts.  French marquetry is the only method in the world which uses a horizontal blade, cutting the packet at 90 degrees on a special tool, the chevalet.

There is more information about this process in previous posts.

This year, from October 9 to 13, I will teach a 40 hour class on French marquetry, focusing on the Boulle process (tarsia a incastro) as well as the Painting in Wood variation of this process, depending on the student's experience and goals.  If there are any returning students I will be happy to include the Classic Method ("piece by piece").

Simple Method for Veneering Columns

On October 14 I will spend the entire day teaching about my method for gluing veneer onto turned wood elements, like columns.  Years ago I had such an article published in Fine Woodworking ("Master Class") and one of my pieces with veneered columns was on the back cover.  I have worked out a simple method which is easy and low tech.  You can turn the elements out of any wood you want and then veneer them with exotic veneer to match the rest of the project.

On October 15 I will follow up this with a full day discussing the properties of traditional protein glues.  For nearly 50 years I have used protein glues exclusively, and have researched them extensively.  I was involved in an international conservation group in Paris that did specialized research into these glues and I have developed my own liquid protein glue formula, Old Brown Glue. I will be sharing my knowledge and experience about how these different protein glue work and what you need to know to use them in your shop.

As they say, "It is worth the price of admission."

I look forward to meeting you there.  Contact www.MARCADAMS.COM for more.

Tuesday, January 17, 2017

Got Glue?


Curbside Delivery: A Ton of Glue!

When I lecture about using glue for woodworking, I usually start in the 17th century.  Although it is true that animal protein glues were used as early as the Egyptian times, traditional woodworkers in Europe up until the 17th century relied on mechanical fastening for their assembly.

First and most common were nails, which  could be fashioned by the local iron worker, if you had the funds.  If you were not able to buy nails then wood pegs would work.  These pegs were not called "dowels" but rather "treenail, trunnel, or some variation of that term".  When used to pull together a draw bore mortise and tenon joint they were quite effective.  More useful is the fact that they could also be easily removed, as they were not glued, thus allowing larger pieces of furniture to be taken apart and moved upstair or across town, where they could be simply pegged back together again.

It was not really until ships began returning from overseas with more exotic timber than the usual domestic oak, walnut, cherry and beech.  Harder woods, like ebony, would check and split when exposed to the climate of Europe.  New methods were devised to saw these timbers into thin veneers, which could be then glued to a domestic substrate wood, combining the beauty of imported wood with the stability of air dried domestic timber.

These veneers, and the methods developed to apply them, created a new tradesman, the "ebeniste."  This term was a direct reference to a woodworker who worked with ebony, and, as a logical extension, exotic wood sawn veneers.  The golden age of ebenistes included such legends as Gole, Boulle, and Roubo.  Without protein glues their craft would never have existed.

There are many different types of animal protein derived glues, and several varieties of each type are used for various specialized applications.


Colle De Poisson or "Fish Glue"

For example, fish glue is produced from different species of fish and different parts of each type of fish.  Fish glue is normally liquid at room temperature and has a fairly long shelf life, at room temperature.  You can expect it to remain useful for up to 5 years or more, depending on the quality of the glue.  Fish glue is made and sold in Canada by Lee Valley and sold in the US by Norland Industries.  Fish glue is what we use to hold brass, pewter, ivory, mother of pearl, horn, and other non wood materials to a wood substrate.  Fish glue cleans up very easily with cold water.  It also has a very low sheer resistance to creep, which allows the non metal elements of the surface to remain stuck as the wood substrate expands and contracts during environmental fluctuations.  Toothing the metal (on the glue side) and rubbing the surface with a fresh clove of garlic prior to applying the glue is the traditional method.

192 Gram Hide Glue and Traditional Glue Pot

Animal hide, connective tissue and ligaments, and animal bones are generally cooked until they become a glue.  Hide glue is used by itself, bone glue is used by itself, and blends of the two are also used in woodworking, usually 1/3 bone to 2/3 hide.  Hide glues are graded using a Bloom gelometer, which is an interesting tool.  You should Google it and see for your self.  It is important to note that these glues are sold in a "gram strength" number which ranges from around 50 to 500.  The confusion is that people imagine the higher gram strength number indicates a stronger glue.  This is false.

All grades of hide glue have adhesive strengths which are comparable.  The difference is that the lower the gram strength the slower the glue sets and the more flexible the bond.  The higher the gram strength the faster the glue sets and the more brittle the bond.

I buy all my protein hide glue from Milligan and Higgins.  If you have questions, I encourage you to call them directly.  Milligan and Higgins  Use extension 18 to talk with Jay Utzig, my favorite glue chemist.  If he is not fishing, then he is at work.

The use of a traditional double boiler glue pot is no longer in fashion.  I use one in my shop, and have done so for nearly 50 years.  I turn it on when I arrive and the last thing I do when I leave is turn it off.  I have many videos on my YouTube channel ("3815utah") talking about using this glue, as well as the excellent videos posted on WoodTreks:  Using Animal Protein Glue


Processed Glue vrs Organic Glue

When I researched methods to modify protein hide glues by lowering the gel point, I eventually developed a formula which I began selling as Old Brown Glue.  It has been nearly 20 years that this glue has been available and the demand is growing exponentially.  I knew that if the glue worked like I thought it did, then every woodworker who discovered it would tell two of his friends.  By this method the word of mouth has created a demand that requires me to cook hundreds of pounds of glue each month.  Lots of bottles, caps, labels, boxes, shipping labels, billing and so forth.  Old Brown Glue has become a business on its own and has exceeded my modest expectations.

I have been asked by luthiers if Old Brown Glue would work for their instrument construction.  I know that luthiers understand qualities of different glues better then furniture makers, and I believe that there is a real application for liquid glues, in addition to hot glues, depending on the project.  Years ago I was approached by one of the most famous guitar makers in America.  They wanted to test my glue to see if it would work in their production run.  They were making a special 50th anniversary edition of their signature guitar and were instructed to use methods and materials which were as close as possible to the original.  I sent them glue and they tested it for two years.  Finally they decided it worked perfectly and began ordering a lot of glue.

I repeatedly called them to ask permission for posting on this blog, using their company name.  I must say that the legal department of the guitar business is much more difficult to have a conversation with compared to the production line workers.

In any event, no response.  Thus, in trying to avoid any direct legal conflict, I will merely post this YouTube video, which I found online: Guitar Factory Tour I think you will be interested in the glue used at the 2 minute mark.  I would also like to post here one of my favorite guitars:

Favorite Guitar Patent

There is another type of protein glue, rabbit skin glue.
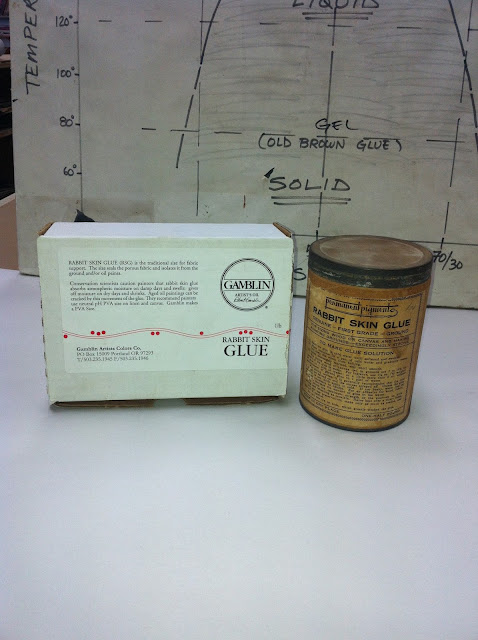
Rabbit Skin Glue
This glue is diluted much more then hide glue and works perfectly with gold leaf and gesso.  It is not practical to use for woodwork, as it is much too thin.

I created this simple chart for understanding protein glue:

Temperature vrs. Humidity

Hide glues and their working characteristics are a function of temperature and hydration.  Dry glues are first hydrated with cold water, approximately 50/50.  The better quality the glue the faster it will absorb the water.  Then the hydrated glue is heated to around 140 degrees where it becomes liquid.  Glue can be heated and cooled as many times as you want, as long as the temperature does not exceed 180 degrees.

Animal hide glue, both Old Brown Glue and Hot Hide Glue, is unique in that it can be in various states (solid, gel, liquid) without damaging the quality of the glue.  It can be repeatedly frozen, thawed, heated, cooled and so forth as many times as you want, as long as it doesn't get moldy or heated to the boiling point.  The same process used to mix it (add cold water and then heat) reverses to cure it (loss of heat and then loss of moisture.)

The rapid loss of heat in hot glue makes it perfect for a fast tack.  Then, more gradually, it looses moisture into the wood and into the environment, for a full cure.  Old Brown Glue takes much longer to tack, so it has a much longer open time.  It then cures more slowly as it looses moisture much more slowly, achieving a full cure in a matter of a few days.  Both types of glue create an equally strong bond.

Why not try some of my Old Brown Glue today?  After all, I make it fresh every day.  I will leave you this email, one of many such emails I receive every day from satisfied users of OBG.  I asked Dave for his permission to copy this message.  He said it would be fine with him.

Hi
I came across your glue whilst researching how to build a cigar box violin. I had made plenty of cigar box guitars but a violin was a whole new challenge so required lots of research and reading. I saw many articles mention hide glue as being the way to go for musical instruments because of the potential to reverse the glued joint without damage to the wood so I looked in my local store to see if they carried any - I knew Titebond did a hide glue, I had seen it on a TV show once and figured a big store would carry it. Fortunately, as it turns out, they did not. 
More reading made me think twice about their version, seems it has extra additives and is not as simple and 'traditional' as your product. Thankfully my local Woodcraft store carries OBG so I picked up a small bottle.
I played around with it on a few test samples and very much liked the grab I got from just a plain rubbed joint with no clamping at all, a couple of days later the bond seemed very strong.
So I used it exclusively on the construction of my first ever cigar box violin. Much to my pleasant surprise this instrument actually played pretty well - I am no violin player but it made a good strong sound and stayed in tune quite well.
However after sharing some video of me playing it on a fiddle forum and reading more articles I came to the conclusion that the angle of the neck/fingerboard was wrong and the 'action' (the height of the strings above the fingerboard) was too high at the end near the body. If I had used regular white woodglue this would have been un-repairable and I would just have to have put up with it and learned a lesson for my next build. Because I had used OBG however I figured I would have a go at fixing this. I wrapped the body of the fiddle in a plastic bag to make sure I did not loosen any glued joints there, set up a small pan on a simple electric ring my wife uses for cooking her plant dyes and got the water boiling away. I held the neck of the violin over this and moved it back and forth for about ten minutes, then applied some very gentle pressure between the fingerboard and the neck using the handle of a metal knife. The end of the fingerboard nearest the body immediately separated a fraction of an inch away from the neck so I held it open and let the steam play in the crack. A couple more minutes and a little more gentle pressure and suddenly the whole fingerboard popped right off. There was no damage at all to either glued surface and only a couple of very small flakes of glue sticking up which sanded right off very some very fine paper. Since I understand that your glue will stick to itself I do not even need to worry about trying to clean up the surfaces before gluing anything else to them. I made a long thin wedge which I have now glued to the neck, that should be dry enough today for me to glue the fingerboard to it and the repair will be complete!
So I shall be using your glue for many more projects (where it is appropriate) and recommending it to anyone else I talk to. I love the nature of the product and the way your business works and wish you all the best of success.
Many thanks
Dave Perks (Sacramento Ca)

This Just In!  It seems that Popular Woodworking magazine is out with an informative article by Christopher Schwarz called "The Best Glue for Furniture?"  He discusses liquid glue and you can either pick up a copy or click here for a taste: Popular Woodworking Magazine: Glue


Saturday, November 7, 2015

Two Exciting New Videos!


Treasure Box Series II
I have been away from my bench for some time, living in a cabin in Montana.  When I am there my life is completely changed.  There is a simple artesian well and all the water needs to be collected and carried into the cabin several times a day.  There is also a need to chop wood and keep the stove going, from morning to dawn, so you don't freeze this time of year.  The only concession to modern life is that we put in electricity to operate the 1950 refrigerator, and at the same time we have lights, which is a big improvement over lanterns and candles.

Then there is the outhouse, situated at a safe distance from the cabin.  Since I am now at a "certain age," I recently put a light and small electric heater in the outhouse, so that provides me with the most comfort possible.  Still, running outside in freezing cold to get there takes a bit of courage.

During my absence, Patrice was working hard on his upgraded computer to produce a video promoting our recent projects, the Treasure Box Series.  Upon completion of the Second Series of boxes, we had the good fortune to borrow back one of the First Series from a client.

Thus, we had an example of each of the Boxes to show at the same time.  Patrice and I took some time to shoot video of how each box operates and what the "secret" internal mechanisms were.

In the First Series boxes, there is a simple button and lever which releases the lid.  In the Second Series we used springs and an invisible button to release the writing surface.  This video allows us to demonstrate how each works, as well as what the internal veneer decoration looks like.

We are very proud to have produced a limited series of four copies for each design, and that all of them have found good homes.  A sincere "thank you" to our clients who support our work.


Another video I found interesting came in by email just this week.  I am excited to see that Joshua Klein is getting close to completing the first issue of his magazine, "Mortise and Tenon."  When I first heard of his efforts I immediately placed an advertisement with him promoting Old Brown Glue.

We discussed at some length his "mission statement" to combine the philosophy of furniture conservation with furniture creation and restoration, and that is close to my heart.

Mortise & Tenon Magazine from Joshua Klein on Vimeo.

I hope you enjoy these two short videos, as well as others we have posted on our YouTube channel, "3815Utah."


Tuesday, September 29, 2015

Five SAPFM Cartouche Winners Together


Left to Right: 2013, 2008, 2005, 2011 and 2014

I just returned from the 2015 WIA in Kansas City.  It was a wonderful time with lots of expert woodworkers teaching lots of other expert woodworkers about everything.  There must have been around 20 different classrooms each with 4 or 5 different classes.

I started the day early Friday with a class on the history of marquetry and finished the day with a class on understanding protein glues.  The class rooms held around 50 people and the glue class was standing room only at the end.  Obviously more people are excited to learn about glues than something old and dusty like world marquetry.

For those of you who have not attended the annual Woodworking in America events, I strongly urge you to find time to attend next year.  Popular Woodworking magazine produces these events and it is a perfect mix of education and market place activities.

I also presented a lecture and demonstration on French Polishing, but I started out with the obvious disclaimer that it is impossible to learn it from a 2 hour talk.  In fact, I know professional polishers in Europe who have been full time polishers for over 10 years who still admit that they don't know everything about it.

After the market place closed on Saturday, it was a great opportunity for the SAPFM Cartouche winners to get together at the SAPFM booth for a photo.  What a great chance for 5 of us to stand together: Will Neptune, Al Sharp, Phil Lowe, Ben Hobbs and myself.  Funny fact: 4 of the 5 were born in the same year, 1948.  Makes you wonder what was in the milk at that time?

On Friday and Saturday the market place is an active center of tools, books, more tools, and woodworkers of all skill levels mingling around talking and buying stuff.  It is a lot of fun.  Thank goodness that I have every tool I need at this point so I am not tempted to get more.  That said, some of the planes and saws are absolutely perfect and would be very easy to bring home.

I have become fairly well known in these circles as the maker of Old Brown Glue, and I took 100 bottles to pass out for free just to promote my glue.  Last year we actually bought a booth and sold the glue, but the cost of the booth and the glue sales broke even.  So this year, instead of being tied to a booth for two days, we decided to just take the glue and make it free.  It felt good passing out glue.

It is interesting to note that one of the primary sponsors of the event was a very well known brand of polyurethane glue.  The glue which you find advertised everywhere.  The glue which cannot be removed from your skin with any solvent.  The glue which is toxic and scored a 53% strength score by independent testing at Fine Woodworking (Issue #192, August 2007, page 37) when compared to PVA Type I waterproof glue.

In the same test, I am proud to say that Old Brown Glue scored a 79% strength score.  This was the highest score for any glue which is organic and reversible.  The average breaking point in the test for Old Brown Glue was 1595 pounds where polyurethane glue broke at an average of 1164 pounds.

Thus OBG can hold 431 pounds more load than the best polyurethane glue.  Since the average male gorilla in the wild weighs 400 pounds, you can think of a standard gorilla unit as a measurement of strength.  Note this is a full grown male gorilla.  We will call a gorilla unit a "G force".

In conclusion, polyurethane glue is 3G and OBG is 4G in strength.

There are 4 Gorillas in Every Bottle of OBG.

Saturday, September 20, 2014

Exciting WIA Week in Winston Salem


Fortunately, I had decided to arrive several days in advance of the WIA conference and stay a few days after, so Kristen and I were able to spend some quality time in old Winston Salem.  In fact, the last time I visited Winston Salem and MESDA was in 1978, during one of my several trips to visit East coast museums and historic settlements.  I am sorry it took so long for me to return.

The weather was great, in fact, with only a slight spot of rain and moderate heat.  While I was away, on the other hand, San Diego had a heat wave, with several days above 100 degrees.  Poor Patrice had to work at the bench, building the top of our Treasure Box (Series 2) while I got to wander around from place to place, thinking perhaps I should have packed a sweater.

Last year, during this time, I was teaching at Marc Adams school, and only had a short time late on Saturday to get away.  I broke several speed limits driving from the school to Cincinnati to see the WIA event.  I got there about 30 minutes before it closed, with just enough time to get my signed copies of Roubo from Chris.  As it turned out, I also had to sign a few copies, since I wrote the Forward.  The best part was that I got to have a nice dinner with Roy later that evening.

This year, I was a speaker, and presented two lectures to a rather enthusiastic and supportive audience.  The first was a talk on "Historic Marquetry Procedures,"and went through basically 500 years of the traditional methods used to create this art form.  The second was "Building and Using a Chevalet."  At the start of this lecture, I mentioned that I have been working for nearly 20 years to introduce this unique tool to woodworkers in North America.  Then I foolishly asked if anyone in the audience knew about this tool.  When nobody raised their hand, a person in the back shouted, "You haven't been very successful!"  As they always say in law school, "Never ask a question if you don't already know the answer."

I shared the lecture room with Roy Underhill, which is always an experience.  As I was setting up my talk, he was putting his things away.  They had scheduled a half hour break between speakers.  Just about the time I was ready to start, Roy had the brilliant idea to "introduce" me. You probably already know he can be theatrical, to say the least.

He said the first time we met was at the Great Salt Lake, and there was a stampede of brine shrimp.  Tim Webster was sitting in the audience, and had the quick thinking to pull out his camera and video it, posting it on YouTube soon after.  I was speechless and had to hold my tongue, while he went on and on, creating a story that was more and more amazing.  My mike was turned up to the max and when I did comment it was way too loud.  Near the end I asked him to turn down the mike, and he crawled under the screen to adjust the volume.  I thought I had a quick wit, but there is no way I can keep up with Roy when he is "on."

Here is the video: Underhill introducing Edwards

While I was having fun in the lecture hall, Kristen was in the Trade Show, where we had a booth for both the ASFM school and OBG.  She is a master of working these shows, and I am very grateful for her talent, as I usually lose my voice and patience trying to compete with the noise.

Of course, Roy had to stop by and pick up some glue...


At the end of the show, they gave away a rather expensive band saw.  I wondered if it would fit in the overhead compartment on the plane, but fortunately I was not in the contest to win it.  However, they asked all the speakers at the show to sign it.  I asked, rather incredulously, if they really want me to sign a power tool?  They insisted, so I did.  You can see my name, with the comment added 
"Use hand tools."


After the show Kristen and I went to MESDA where we had a nice tour with Daniel Ackerman.  We also enjoyed a private home tour by Tom Sears, both of which are members of SAPFM.  We had dinner with Jerome Bias, who is the joiner at Old Salem, and then visited him at work, where he demonstrated his Roubo veneer saw.


Across the hall Brian Coe was using the foot power lathe to make some turnings.  That is a rather impressive tool, made from massive pieces of oak.


All of this activity was in the Brothers House, and it was full of woodworkers from the show, having a great time sharing stories.  There was a warm sense of camaraderie and mutual friendship.


I made a promise to myself not to wait another 30 years before returning to Winston Salem.  Thanks to Megan, Don, Roy, Jerome, Daniel, Phil, Freddy, Martin, Tom, Brian, Will, and too many others to name.  You know who you are!

Wednesday, August 20, 2014

OBG Raises Questions and Provides Answers


Made Possible by Old Brown Glue


I developed and used Old Brown Glue nearly 10 years before I began selling it to the "public." That was almost 15 years ago, and I was naturally concerned about how others would be able to use this glue and what questions they may raise.  Since that time this glue has been used for making American Indian rocket ships, artificial kidney stones, as a bonding agent for exterior sprayed finishes, applying veneer to 10' tall architectural columns in Florida, Alaskan native drums, "craquelure" finishes, and too many other odd projects for me to remember.

Of course, my intention in making and selling OBG from the start was so that other woodworkers would be able to use it and appreciate its unique features, as I have.  So I was pleased to see the increasing number of furniture makers and luthiers who are using this glue on a regular basis.  And, since my name and phone number is on the label, I am constantly hearing from these people and answering their questions. I am happy to be of assistance, and always ready to respond to emails or phone calls, since I feel somewhat responsible for the success of their projects.

In order to fully understand how glue works, it is instructive to discuss not only the glue but the properties of the wood itself.  How the wood is prepared, what species it is, how it is joined and other factors contribute to the success or failure of the work.  That is why studies of adhesion spend a lot of time discussing the material and how it is prepared.  See the article in Fine Woodworking, "How Strong is Your Glue?"

The American Society for Testing and Materials (ASTM) defines an adhesive as a substance capable of holding materials together by surface attachment.  There are a variety of forces at work which make this possible.  The most common is called "mechanical bonding" meaning that the surfaces are held together by an adhesive that has penetrated the porous surface while it is liquid, then anchored itself during solidification.  With some adhesives, there are also other physical forces of attraction, which are referred to as "specific adhesion".  These include intermolecular attraction forces which form bonds between the adhesive polymer and the molecular structure of the wood itself, such as van der Waal's forces and hydrogen bonding.  I believe that covalent bonding is also a factor, which is 11 times stronger than hydrogen bonding, but at this time there is no clear evidence that such bonds constitute an important mechanism in adhesive bonding to wood.

The reason I suspect that these molecular forces are a factor is that water has a strong molecular attraction to wood, primarily through hydrogen bonding with hydroxyl groups of the cellulose which is in the wood.  Since protein glues are carried by hot water, it is obvious to me that they would have excellent penetration into the wood surface and form specific adhesion with the molecules of the wood itself.

Animal glues are derived by the hydrolysis of the protein constituent collagen of animal hides and bones.  They are described as "hydrolyzed collagen', and are actually various amino acids which join in polypeptide linkages to form long chain polymers.  Studies have indicated that most glue molecules consist of single chains terminated at one end by an amino group and at the other end by a carboxyl group.  Cross linkage between protein molecules is possible through hydrogen, ionic and covalent bonds.

These glues are manufactured in a wide range of average molecular weights but are graded for commercial use by a test instrument called a "Bloom Gelometer." In general, woodworkers use glues rated at 192, 222, or 251 average gram strength.  The higher the number, the faster it sets and the more brittle the bond.  The lower the number, the slower it sets and the more flexible the bond.  I have used Milligan and Higgins hide glue, gram strength 192 for the past 45 years, both in the glue pot and it is the basis for the formulation of Old Brown Glue.

The addition of urea to protein glues acts as a gel depressant, simply lowering the gel point.  Franklin and Titebond both manufacture and sell a similar liquid protein glue, and they use other chemicals to achieve the same result, such as ammonium thiocyanate or dicyandiamide.  Because of the large number of hydrogen bonding sites on the protein molecule, an amazingly diverse number of additives can be used to modify animal glues, producing a wide range of results.  My goal was simply to lower the gel point, using the most basic organic chemical, and I chose urea.

The inspiration for this decision was my participation in a research group in France some 20 years ago.
The group was called ADEN, and was a joint collaboration between the Musee des Arts Deco, in Paris and the Ecole nationale Superieure des Technologies et Industries du Bois, in Nancy.  One of the research projects involved testing the use of protein glues, with and without modifiers, in bonding wood to wood and wood to metal.  Long term environmental stress testing was done to anticipate aging.  The results wer published in a paper in a paper by Aurelie Garcet in 1996, titled "Etude des Colles D'Origine Animale Utilisees Pour la Restauration de Marqueteries Anciennes."  The general results of that testing included adding thiourea to the glue but thiourea is a known carcinogen.  The only difference between urea and thiourea is that thiourea contains a sulfur molecule, so I decided to do my own testing with urea after I returned to my workshop.  It took me 37 different formulations to achieve the results I wanted.  Surprisingly, it did not take a lot of urea, but for obvious reasons, I cannot exactly state how I formulate the glue.

The American Institute for Conservation of Historic and Artistic Works (AIC) has a subgroup, the Wooden Artifacts Group (WAG) which I have been a member of in the past.  This group publishes papers in their WAG Postprints, and in 1990 published a paper by Susan Buck, from Winterthur.  The title was "A Study of the Properties of Commercial Liquid Hide Glue and Traditional Hot Hide Glue in Response to Changes in Relative Humidity and Temperature."  Of course, this was before OBG was developed, so she used "a new, unopened bottle of Franklin Liquid Hide Glue with an expiration date of January 1991".  I should mention that Franklin was the first company in America to sell liquid hide glue.

Her conclusion states:

Based purely on strength characteristics this testing indicates that liquid hide glue is the glue of choice for repairing a join which will undergo significant stress, such as the structural join of a chair in regular use.  But, more importantly, that decision must also take into consideration the environmental conditions.  Under normal conditions of 50% RH and room temperature liquid hide glue provides the strongest bond.  However, hot hide glue proved to be the more stable of the two glues under extreme conditions of high heat or high humidity, and thus would be the ore desirable choice if fluctuation environmental conditions are anticipated."  The "extreme" conditions in her testing occurred at 84 % RH and 150 degrees F.  This is not surprising, as protein glues are reversible and those are the exact conditions under which the glue converts from solid to gel to liquid.

In fact, reversibility is one of the most important features to me in deciding to use protein glues in my work.  All furniture needs repair.  If you cannot reverse the finish or bonding agent easily, the furniture cannot be repaired easily.  One of the reasons antique furniture has survived for centuries is that it can be easily repaired.  As soon as modern adhesives or modern catalyzed finishes or epoxy fillers are used, the antique is damaged severely.

The fact that protein glues are "reversible" always raises questions, since modern synthetic adhesives are not, in fact, reversible.  You need to get both humidity (water molecules) and heat to the surface of the glue to liquify it.  That means that, if the wood joint is well made and tight, and there is a protective finish applied to the wood, and perhaps a wax is applied to the finish, and the object is in an environment which is not the surface of Venus, then the glue will hold.  However, if you throw the chair or guitar into the jacuzzi and leave it overnight, it will come apart.  Seriously, luthiers need to repair their instruments, and I understand that they use a range of glues for different reasons.  Liquid hide glues as well as hot hide glues in different molecular weights are commonly used and work perfectly, and there are instruments which are centuries old to serve as a testament to this fact.

All modified liquid protein glues have a shelf life.  Unmodified dry hide glue has an infinite shelf life, but when the protein is in solution the presence of water facilitates a chemical breakdown of the glue.  The pH changes over time.  Normal protein glue is in the 6 to 6.6pH range.  OBG is formulated to start at 5.5pH when fresh and decay to 6.0 after 18 months in the bottle, regardless of storage conditions.  Keeping it in the refrigerator prolongs the shelf life, and it can be frozen and thawed as many times as you wish, further extending the useful shelf life.

What happens to the glue over time in the bottle is that the viscosity changes as the pH changes.  It starts out as a gel in the bottle, which requires heating to use, and eventually becomes quite thin and liquid past the due date.  It also develops a strong ammonia smell, as a result of the chemical breakdown of the urea, and this is an indicator that the glue is no longer good.  I always recommend you buy it and use it fresh, before the due date, and if you are not sure, do a simple overnight test.

You can also heat and cool it for normal use as often as you want and as many times as necessary.  We do this all day long to adjust the viscosity for our work.  Simply take hot water from the tap and place the bottle in the water.  In a few minutes it is ready for use.  One advantage is that you can use the water to clean your hands since the glue gets very sticky and we often use our fingers.  Of course it is not toxic at all.

There are questions about how the urea affects the glue strength over time and why it is softer than hide glue on the surface.  My research seems to prove that OBG cures over time by loss of moisture, which is a factor of the wood and environment.  Thus, when the glue is applied to a joint or other surface and pressed together, the wood absorbs the moisture, allowing the glue to cure fairly rapidly.  However, the glue which squeezes out and rests on the surface retains a high degree of water for a fairly long time.  It might take days or weeks for it to completely dry out, which makes it softer than hot hide glue, which always dries brittle and hard.  I think this is an advantage in my work, since I often work with period finishes and the hot hide glue will damage the finish when I try to remove it.  I find the liquid glue cleans up easily with cold water and a sponge, conserving the original finish.

Thus, inside the joint, after the water has dispersed and the glue has cured, there is no longer any reaction between the protein glue and the urea modifier possible.  The glue is stable over time, and I have tested many projects over my career which gives me the confidence to continue using and promoting this wonderful material.

Further reading can be found in my article, "Why Not Period Glue?", published in the Society of American Period Furniture Makers Journal, November 2001.

Tuesday, August 5, 2014

How To Veneer a Column

Damaged column with contact cement

I think it is probably obvious that I love antique furniture.  In particular, I am fascinated with the quality and variety of designs that were produced in Europe and America.  The high point of this period was during the 1820's and best represented by the Monroe Doctrine.  If you look at the furniture made in major American cities during that decade, you see rich Cuban mahogany, with highly figured veneers, and carved elements representing cornucopia, lion's heads and paws, stars, and other Egyptian, Roman and Greek motifs.  In addition to all this elaborate decoration one of the most common elements was the use of veneered columns, usually with a carved capital or imported gilt bronze mounts.

I was always fascinated with the veneered column as a form, and very early in my career as a furniture builder I did some research to try to duplicate it for my self.  I failed miserably.  Several times.

I began with hot animal glue and wet jute webbing.  I put the hot glue on the column, wrapped the veneer around and then added the webbing.  I tried to then heat the webbing on the theory that it would shrink and pull the veneer tight.  I remember reading something somewhere about this, and they suggested holding the column near the fire, but I live in San Diego, and it is not often that I have access to an open fire.

Next I tried to use bicycle tire tubes.  They were messy and applied uneven pressure, leaving marks.  Also, I couldn't work fast enough and the glue set before I was ready.  There was no way to add heat, since the tubes would distort and loose their stretch.

It was nearly 15 years after that when I was involved in a conservation group in Paris and discovered that I could modify the glue to give a longer open time.  I began experimenting with urea and, after 37 different formulas, found a mixture that worked.  That was the creation of Old Brown Glue.  It was designed to solve the problem I had struggled with all that time, and the first time I used it to veneer a column it was a success.

In December 2004 I wrote a column for Fine Woodworking (Issue Number 173) that was published in the Master Class area of the magazine, called "Low-tech method for veneered columns."  To go along with this article, they put one of my pieces on the back cover, the Bonheur du Jour.  This piece is one of my early favorites, and has large veneered columns on the base and small veneered columns on the top.  The veneer is some plum pudding Cuban mahogany I purchased years earlier in New York, and I didn't have enough to do the entire desk, so I used a contrasting Honduras ribbon mahogany in the upper section.  That meant that I had no surplus material if the veneering didn't work as planned.

I thought the article would create a bunch of interest and I expected a lot of phone calls about veneering columns.  The only phone call I got was from a person who wanted to know where I got the mounts and if I would sell him the blueprints to make the desk.  He was disappointed to learn that I don't use any plans or measured drawings when I build furniture, and the mounts were from Paris.

Recently a table came into the shop for restoration and it included a column which had been veneered using a cheap mahogany veneer and contact cement.  This table was English Regency and made with Brazilian rosewood.  The client agreed that I should remove the mahogany and use rosewood, which is now on the endangered species list.  However, I have a lot of rosewood, sliced very thick, which pre dates the ban.  Most of it was harvested over 50 years ago and the quality is amazing.  I purchased it from an old cabinet maker early in my career and have kept it for special projects.

As I began to do this job, it occurred to me that it would make a good video.  My partner, Patrice, has been successful at filming and editing videos here at work, and he set up two cameras to record the work.  Our videos can be seen on YouTube by searching for our channel.

The real breakthrough in my efforts to veneer columns was the direct result of my problems with my back.  All my life I lifted heavy objects and stressed my back without any problems.  However, when I was 48 I actually damaged my back and suffered a period of pain.  The doctor recommend that I use a stretchy band of rubber to exercise my muscles and rebuild my strength.  As he handed me a short piece of the stuff, my mind immediately realized this was the perfect solution to the problem I was having with inner tubes.  Sold as "Rep Band" (resistive exercise band for exercise, rehabilitation and conditioning) by Sammons Preston, it comes in different strengths.  The purple is the strongest (level 5), and a box has 50 yards.  Here is the link: Rep Band

Veneering a column actually is very simple with this process, but it takes a few days.  The reason is that the glue sets slowly, which is a good thing.  It allows time for the application of the glue, veneer and elastic bands.  Then, over night, the glue begins to set and the veneer shrinks to fit on the column.  The next day you can cut the overlap and make a joint, reheat the glue at the seam and wrap it up again.  One more day and it sets completely, even though if you have any problems you can simply reheat the area and fix it.

Sit down, get a cup of coffee and watch me veneer a column: Veneer a Column

I think if you watch the video you might be encouraged to try veneering a column yourself.  It is fun and rewarding and adds an element to your furniture design portfolio which you may not have considered previously.

Just don't call me and ask for plans to build the table.

Properly Restored with Hide Glue

Tuesday, July 15, 2014

Another Milestone for Old Brown Glue

Old Brown Glue Hard at Work
Brian Boggs is an amazing chairmaker.  His chairs are not only beautiful but I am sure they will last a lifetime of hard use.  To say Brian is obsessive about details is an understatement.  I remember in particular one long phone conversation with him about what dimension is best for a "tight" fit.  In my analog world, the proper "tight" fit is determined by how much force is required to push the spindle into the socket.  In Brian's mind, there needs to be an exact dimension, specific to each wood species and application.  We went back and forth, and I was never able to provide him with a number.

At some point, Brian discovered the liquid animal glue I was using every day, and told me he wanted to try it for his chairs.  He found out it worked great and insisted that I start putting it into a bottle so I could sell it.  Thanks to Brian, I decided to begin selling glue and came up with the basic name, Old Brown Glue.  I reasoned that woodworkers were used to calling their synthetic glue either yellow or white, so I went with brown.

I remember when I was asked by Joel at Tools For Working Wood to supply him with the liquid hide glue as a commercial distributor.  Before that, simple word of mouth about the glue meant that we would get a phone call from time to time asking if we could sell a bottle.  I guess we were selling about 3 or 4 bottles a week, on average.  Joel suggested that we make two sizes available, a 20 oz (net weight) and a 5 ounce.  I resisted putting the glue in smaller bottles, since I used it all the time and the larger bottles were fine.

In any event, for several years, Tools For Working Wood was the only place where you could buy the glue, outside of direct sales from my business.

Then the internet took over, and people who used it wrote nice things about it.  Cabinet makers, chair makers, luthiers, and even museum conservators all commented positively and the phone calls increased dramatically.

The next phase was when Lee Valley called and placed a large order, forcing us to design labels in both French and English, as well as convincing the Canadian government that our glue was not toxic or dangerous.  As soon as we finished with the paperwork, our glue was placed in stores across Canada.

Soon after, Rockler contacted us and began stocking our glue in their stores.  Between Rockler and Lee Valley, I was cooking glue every week, filling bottles and shipping out large boxes of product.

That meant I needed a cooking space in the business, as well as a bottling place, a labeling place, and a shipping department.  At that point, there was a fairly continuous flow of glue from one end of the business to the other.

We joked about contacting Home Depot and visualized seeing our product sitting on the end isles next to the infamous Gorilla.  Yeah, right...

However, last month we were contacted by Woodcraft Supply, and they placed a very large order!  In fact, they followed up that order with two more, even larger.  Now I am cooking glue every day, going through 50 pound bags of Milligan and Higgins glue as fast as I can open them.  We are needing to order bottles and labels all the time, and the glue is everywhere.

The other day, I searched on Google for "Old Brown Glue" and found the first ad for this was on Amazon!  Woodcraft is selling our glue on Amazon!!  Check it out.

Move over Gorilla, who needs Home Depot?
Got Glue?

Wednesday, July 2, 2014

I Miss Posting On My Blog


I didn't understand the lasting effect it would have on me to actually "retire" from some long term activity, like I talked about in the last post.  That was in March, when I quit all my activities in historic commercial revitalization and non profit management boards to focus full time on my business.

Now, 3 months have passed and, although I have been very busy working on exciting projects, I have not had the urge to post anything on my blog.  I realized today that it is time to get back to work on keeping the blog up to date, as I appreciate the interest it has for other woodworkers.  Most of all, I look forward to the comments and feedback I receive when a post something.  It is rewarding to know that I can share my abilities with others in such an easy and practical system.

I have just completed an article for the Society of American Furniture Makers' Journal, which will be published at the end of this year.  As the SAPFM Cartouche Award winner, I get the pleasure to see my work on the cover of the Journal, as well as contribute something inside.  I wrote articles for each of the first three volumes of the Journal, when it started, and am pleased to see it has become one of the most impressive publications on American Furniture today.  Even if you can't make the SAPFM meetings in Williamsburg, getting the Journal in the mail justifies the membership dues completely.

I guess that now that I have the Cartouche, I am on the "A" list of woodworkers.  I will be speaking at the Woodworking in America conference in Winston-Salem in September.  I see my photo placed next to Frank, Roy, Phil, Peter and others who I deeply admire and respect, and find a real satisfaction that I have been accepted into that group.  These are the intellectual philosophers and technicians in our world that have chosen woodworking as a craft life.  In my mind, they are national treasures.

My talk will address the chevalet de marquetry and historic French marquetry processes.  I speak on Friday and Saturday.  Also, I will have a booth at the Marketplace for the American School of French Marquetry and be selling Old Brown Glue, if you need it.  There will be a show special price.  I hope to see you there.

Here is the link for the WIA Show:Woodworking in America Show

Last month Asa, past editor of Fine Woodworking magazine, arrived in San Diego to judge the Design in Wood show.  He took some time to visit me at work and put together a photo tour which will be posted online in a few days.  Also, we sat down for a one hour audio interview, which went really well.  Asa is a smart guy and a good friend.  While he was here, he picked up one of the guitars that Patrice had veneered with marquetry, plugged into the amp and rocked out some serious licks.

If you want to listen to the audio podcast, here are the links.  There are two segments, each 30 minutes long.  You will find them at the last half of each of the podcasts.  The podcast starts with the editors discussing different topics and ends with the interview.  I found it amusing that the first podcast begins with a talk about dumpster diving and junk finds.  When Asa asks me how I started, I talk about living next to the city dump when I was young, and bringing home all the things I found at the dump to repair.

On this link, my part starts at 34 minutes:  Fine Woodworking Podcast Interview Part I

On this link, my part starts at 45 minutes:  Fine Woodworking Podcast Interview Part II

I will let you know as soon as the video shop tour is working.

It's good to be back.  I will post again very soon.  It makes me happy.


Saturday, January 4, 2014

Complex Curve Repair Simplified

Another Day Another Chair Repair
I work very hard at being humble and modest.  People who know me will laugh at that statement, but I rarely, in fact, say that I am the "best" at anything I do.  That is because I know others who are my inspiration, who are dramatically better at what they do than I am.

However, I often walk home from work thinking to myself, "I am the best chair repair man in this city."

I don't say it out loud, since, these days, other pedestrians will think I am talking to someone on the phone while I walk.  (In the past you had to be mentally unstable to walk around talking to yourself; these days it is the norm.)

Yesterday I was thinking, with a bit of satisfaction, how well this particular repair had gone.  I visualize in my mind all the elements of the repair and the way it will survive the stress of use and, if every little element of the project went well, I know I earned my pay.  Perhaps I'm obsessive.  No, to be honest, I AM obsessive!

This project was a pair of Louis XV revival 19th century armchairs which had a brass leaf gilt finish.  They had been poorly repaired over the years, including many small brad nails sunk into each of the joints and missing areas filled with epoxy filler.  Using nails to repair furniture is a crime.  First of all, it just doesn't work.  Second, it prevents the actual repair, since the joint cannot be opened easily.  Third, it requires some amount of damage to remove the nails, either by punching them out, or digging them out with tools.

All the nails do, in fact, is prevent the chair from falling apart, while at the same time allowing enough movement that the chair becomes a rocker.

One of the chairs had its crest rail broken and repaired several times.  All the wood around the mortise was damaged, and the tenon in the style was messed up.  There were several elements of the wood which were fractured and areas which were built up with epoxy.  In effect, there was nothing left structurally of the joints.

A Single Clamp Pulls Joint Together
I cleaned each of the small fragments and, over several days, rebuilt the cheeks of the mortise.  Still there was not enough wood to hold properly.  Therefore, I drilled two 3/8" holes by eye into the ends of the tenons and also into the sockets of the damaged mortises.  You need to do this carefully, since there is no mechanical way to accurately align the holes.  I put some light tack masking tape on the wood, each side of the joint, to provide at least a line of sight.  The rest is experience.

Note that the crest and back of these chairs are curved in two directions.  Therefore, this is a perfect example of using vector forces to create proper clamping cauls.  Look at the joint and visualize the single vector which bisects the surface of the joint, in the center, at 90 degrees.  That is where the clamp force needs to be applied.

Search this site for other posts on Vector Clamping.

Now take soft wood, like poplar or pine, and make wood cauls that you can clamp to the frame on each side of the joint.  These cauls need to have a fairly large surface area, so they don't slide and can be clamped securely.  Also these cauls need to have a "purchase" spot where the final clamp will grab.

Perfect Alignment

Note the two cauls on either side of the joint are held by two pony clamps each.  Then the longer single pony clamp is applied which pulls the joint together.  Finally, a second pony clamp is used to provide alignment top to bottom and a "C" clamp is used, with some plexiglass, to align the faces front to back.

The plastic allows visual inspection as all the clamps are tightened, in sequence, to pull everything together.

There is also a weight used on the front of the seat to keep this chair from falling backwards and spoiling my day.

Of course, I only use Old Brown Glue for chair repairs, since it is the best glue "in the universe" for this type of work.  I don't brag about my talents, but I do brag about my glue.

Sunday, December 29, 2013

Spring Clamps...Literally

Hand Surgery


I must have an unlimited source of clamping choices.  When you spend over 40 years repairing antiques you get creative with unique problem solving.

Most of the repairs I see come into the shop which have failed are the result of poor clamping efforts.  Face it, when the wood surfaces do not meet under precise pressure, even the best glues do not solve the problem.  A good example was the last post, where it was obvious that the person who wanted to reattach the table leg simply injected lots of plastic glue and pushed the leg back in place.  The result was a large surface of dried plastic glue which held nothing and prevented the wood joint from closing.

In that case, a simple pipe clamp would have worked, but I suspect that repair person did not have one available.
Clamps Where You Want Them

Not all cases of clamping are that obvious.  Today I needed to reattach several fingers on a carved chair.  This chair was made in Italy and had two "servants" carved at the front to hold up the arms of the chair.  I'm in no position to judge the political correctness of this subject; my job was to repair the broken hands, which had lost several elements.

As with all carving, there was no flat surfaces to clamp and the elements I needed to reattach were tiny. Fortunately, I have spent years upholstering and had a good supply of springs in the shop.  Taking these springs and cutting away loops gave me a good supply of clamps.  This is a neat trick, and I think all shops should have them available.

Available In All Sizes
I know this idea is not new.  There are spring clamps sold, with a special tool to hold them in place.  But the last time I looked, those kits were expensive and I hate to buy stuff, unless I simply have no choice.

Old springs are free, and by cutting the loops I have several sizes to choose from.  I take a file and make points on each end, so the clamp bites into the wood with the smallest mark visible after the job.  I can bend and shape these clamps to suit the job.  The important thing is that the points of the ends line up, creating a direct clamping force.  See my post again on Vector Clamping.

Add Points With File
I made some rough fingers and cleaned up the broken ends so I had a good fit.  Then I just applied a small bit of Old Brown Glue and the spring clamp.  Final result is a good amount of pressure and a repair which will allow me to finish the carving as I wish.

Simple.  Effective.  And Free.

Friday, December 27, 2013

Why Not Period Glue?

Synthetic Glue Sucks
I joined the Society of American Period Furniture Makers in 2000, when they first got together.  I really enjoyed going to Williamsburg, even though it was in January, and I had been there dozens of times before.  The reason I had so much fun was the experience of spending a week with like minded furniture makers, from all over the country.  We talked about furniture styles, different methods of construction and tools from different periods, finishes and just about every aspect of our craft that was important.

Usually, when I am in a social environment and others find out I work in wood, the topic of conversation ends up with someone discussing their efforts to build a coffee table or birdhouse.  It is a completely different situation at these SAPFM events.  Furniture design and construction is a real passion with this group, and nothing is too esoteric or obscure to merit hours of intense dialogue.

What fun.

I was an active member in the early years.  I was fortunate to be asked by Roy Underhill to tape a segment on his show, The Woodwright's Shop, which required me to ship a large container of tools and materials back East.  At the same time, since I was there with all my stuff, I demonstrated on stage during the SAPFM conference and made a short video for them about the chevalet.

It was interesting, since there are two back to back sessions of the "Working Wood in the 18th Century" event, and I had a conflict with the second week.  Therefore, I asked Silas Kopf to stand in for me and use my props.  During my presentation, I had each segment of the talk prepared in boxes ahead of time.  Each box was numbered so all I had to do was reach under the bench and pull out the next box which had the materials for that segment of the talk.

I worked fine for me, since I was familiar with all the props, and had a time tested presentation developed over several years of talks at the Getty museum.  It was not so easy for Silas, who does his marquetry using a completely different method.

I need to stress at this point that I think Silas is the greatest marquetry artist working in the US.

As it turned out, he made the effort to use my props and present the talk on French marquetry methods that we had agreed to.  But, after about 15 minutes of his talk, he abruptly changed direction.  "That's the way Patrick and the French do it.  Now I want to talk about how I do it."  His presentation was excellent, but not what we had planned.

I also wanted to contribute to the new Journal of the SAPFM, called "American Period Furniture."  For issue #1 I wrote "Form Follows Process," which analyzed the different methods of work used by craftsmen before and after the Industrial Revolution.  For issue #3 I wrote about my research into the Price Guides of the early 19th century, documenting the time required to make each aspect of furniture using hand tools, "Period Productivity".

1820 Cuban Mahogany with 1980 Synthetic Glue
In Issue #2 I did something different.  During the first session I attended, I was amazed that all the woodworkers there were passionate about choosing the right woods, following period design exactly, understanding period finishes, and so on.  There was a certain amount of divergence in whether or not to use only hand tools, and that I understand.  Most of the members had access to power tools and the general consensus was that it was ok to use power as long as a certain amount of hand finishing was involved.

The area which startled me involved glues.  Practically every person I talked with used modern synthetic glues to make their period furniture.  I could not understand this "blind spot" in an otherwise very academic group of individuals.

So I wrote an article for issue #2 called "Why Not Period Glue"  I took the position that traditional glues were used for centuries and worked fine.  If there was a modern glue which did something better than these traditional glues, show me the advantage and I will use it.  The only one which comes to mind is epoxy, which can be used to repair metal parts.  Of course epoxy should never be used for wood repairs, or worse, tortoise shell, ivory or any other material.

Missing Tenon/ Covered in Plastic Glue
Most of the woodworkers used glues like yellow glue, carpenter's glue, white glue, and other glues with fancy chemical names I never heard of.  Hardly a glue pot among the entire group.

Only those who made their living restoring antiques seemed to understand why it is important to use traditional glues.

Cleaning Surface with Toothing Iron
I was reminded of this article today, as I worked to repair a broken leg on a period Baltimore dining table.  The leg was originally attached with a double tenon to the apron.  One of the tenons had broken and the repair was made by adding yellow glue and clamping.  That repair did not work, of course.

Old Brown Glue Ready for Use
In typical fashion, the clamping was not done properly.  The wood surface was not cleaned in advance.  The missing tenon was not replaced.  And on other legs of this table, the repair was "enhanced" by a series of nails, which did nothing but damage the wood.

As I removed the leg to begin the repair, it was obvious that the synthetic glue did not stick to the wood.  Using a sharp chisel, I was able to pick off most of the glue chips, which came away like flakes of paint.  I think of synthetic glue as a plastic, and plastic does not stick well to wood.  I typically use a toothing iron to scrape away the glue residue and tooth the surface.  You must be careful to not remove wood; just glue.  It takes a bit of care, and the toothing iron helps.

Tenon Replaced, Ready for OBG
 I just felt good, when I was ready to apply the glue for the repair.  All the wood surfaces were toothed and clean of plastic glue.  The tenon was made and installed.  The clamps were ready and clamping blocks were installed.  (See the post on Vector Clamping)


I warmed the glue, brushed it on and applied the clamps.  Another antique repair done professionally, using the same glue that the original maker would have used some 200 years ago.  I'm sure he would approve.

Gigi Inspecting Protein Glue