Sunday, November 25, 2012

Forward Into The Past!

I take this job of blogging very seriously.  One thing the internet has provided the globe with is a chance to share a virtual collective consciousness.  That is why my personal contribution is so important.  Not because I am important, but that I may, in fact, contribute to the universal search for our place in the universe.  Defining our cosmology in a way that accepts truths and supports individuality.

I have had some significant influences in my life that have contributed to my own understanding of my place in time.  Some have been superficial, like music, for example.  Coming of age and forming my persona under the sound tract of Pink Floyd, Cream, Traffic, and, most importantly, Hendrix, mixed with all night visions created by the Firesign Theatre can be very mind expanding.  (If you are old enough you recognize the title of this blog as a Firesign Theatre cut.)

If you have never heard of them, take some reflective time and close your eyes, darken the room, partake of your favorite mind altering material and just listen to the mental movies that classic Firesign Theatre stories create.

There have also been personal influences, as I have written about before.  When you seek out a "master" and sit at their feet to humbly seek their wisdom and they treat you as equals, it can be very inspirational as well as educational.  There is a rare mix of humility, knowledge and confidence that makes a student ready when the time comes to evolve into a "master" in his field of experience.  Schools try to create this with educational programs that award degrees, but that does not always guarantee success.  What is important is how you live your life and what you do with your precious time here on earth.

One of the masters I learned from came to me over the television.  The first time I turned on the Woodwright's Shop program on PBS, more than 20 years ago, and saw Roy Underhill frantically working a piece of wood into something, using only hand tools and his copious sweat and blood, I was transfixed.  Here was a guy that I could instantly relate to.  His show depicted exactly what my life was on a day to day basis.  He loved what he did.  He understood the larger implications of what it meant to work by hand, with the element of risk.  He studied and explained the old ways of working in a way that was easy to understand and appreciate.  In short, he was a true brother in arms (Dire Straits).


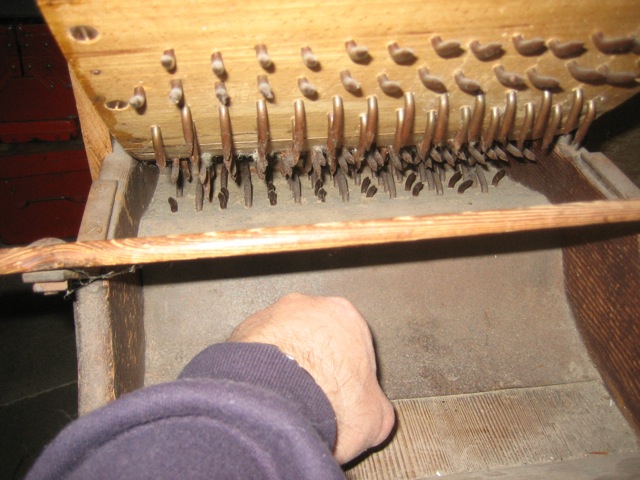
Over the years, I watched Roy every chance I got.  I saw him build boats, cabins, chairs, tools, spinning wheels, whistles, lathes, and every thing else under the sun.  Each episode started with him walking out of the city and into his shop in the woods.  He worked the camera in a way that made me feel he was in the room with me, talking only to me.  I often found my self talking back, having a conversation with the TV.  It felt normal and still does.

I first actually met him when I joined the American Woodworking magazine traveling show.  I know he has a lot of fans, and yet, when we met, I found him to be honest and personally interested in my perspective.  One truth about a master is that he listens.

I was honored when he asked me to present my chevalet and marquetry experience on one of his shows.  I think that was in 2008, but my memory is not clear about dates any more.  I stayed with him and his wife in Williamsburg and we had long and deeply personal conversations late into the evenings.  When we taped the show, I was able to learn a great deal from him, even though I had a fair amount of television experience in my past.  He is certainly a master at presenting information in the most entertaining way possible.

Last night, I found a TED talk which featured Roy working the crowd.  It reminded me again of his skill at public speaking, while at the same time using an axe to skillfully demonstrate traditional workmanship.  I have personally seen him do this talk on several occasions.  At one of these talks, I was the person holding up the tree, while he took swings at it.  Seeing his abilities at close range make this presentation even more remarkable.  He can place the chips from the axe exactly where he wants, much like a professional golfer can place the ball on the green.  All the time blending his act with serious information and classic bad jokes.  Each time it is fresh, and he has done this thousands of time.

As I watched the TED talk, I sensed a certain resolve in his voice.  He has been "preaching" the virtues of hand workmanship all his life.  He is the most public face in woodworking for this position.  His show is the longest running PBS "how to do it" show, and yet Norm, with all his ridiculous and expensive power tools, has much more success and fame.  When Roy describes his axe as "a piece of metal on a stick" he brilliantly illustrates his position.  That "metal on a stick" can do almost anything, if you know how to use it.  Nothing illustrates more the relationship between man and tool than that axe in the hands of a man like Roy, or the image of Norm standing in the middle of hundreds of thousands of dollars worth of power tools, trying to make a bookcase.

I was raised and trained as a scientist.  I studied and worked in the field of high energy particle physics and my degree is in Applied Physics.  I grew up immersed in the world of technology.  I saw the first computers and was born at the same time television was introduced to the world.  I watched live as the first man stepped on the moon, and the first heart transplant occurred.  As a scientist, I understand that the industrial revolution has changed not only the social and economic fabric of the past two centuries, but is now actually transforming the global climate, and that it is measurable.  We cannot continue to burn fossil fuels at an increasing rate, just to satisfy our need for mass consumption of useless objects.

Roy, in his TED talk, says, rather ironically, that he was asked to represent the "Past."  He then succeeds in pointing out that the past is still relevant today.  The past is the way of the future.  We can learn from the past and use that knowledge to mitigate our footprint on the earth.  We can, and must, transform our relationship with our home planet, by better understanding our relationship with our global assets, like food, water, and air.  If we are just custodians of this planet, what kind of message are we leaving our children if we destroy it?

I am not crazy and do not want to eliminate all technology from my life.  Living an extreme lifestyle is not the answer.  I read the book, "Be Here Now" in 1971, the same year I graduated from UCSD, and I understood what a life, in "balance" meant for personal happiness.  I still follow those guidelines.  That is why I can relate so much to Roy, and what he represents.

We all can learn from what he has to offer.  He is a national treasure.

See for yourself:
TED: Roy Underhill and his Axe


Sunday, November 18, 2012

Tambour Glue

40 years ago I was the first one in San Diego to sell a roll top desk for $2500.  It was the period of Golden Oak and everyone was furnishing their houses with oak furniture.  I would drive back to Nebraska and buy a truck load.  I remember buying a dozen oak cabinet treadle sewing machines (with the machines working), numerous oak tables, both square and round, with lots of leaves to match, countless press back oak chairs, hutches and desks.  I sold them as soon as I unloaded the truck.

I was always looking for exceptional desks, and one day in Lincoln I saw this monster desk.  It was quarter sawn oak, with what looked like hundreds of small interior drawers, all different.  The outside was beautifully paneled with raised panels on all sides, even underneath where you couldn't see them.  It also had a matching chair.  This desk was so large that I could lay down on top of it and close the roll over my head.

In recent years I haven't seen a desk sell for much more than lumber, as they just are not popular any more.  Then, suddenly, three show up in my shop for repairs.  One of them was on its way to the dump and the handyman had the good sense to drive out of his way and drop it off at my shop.  Free.  The second desk was in pieces at a garage sale, and, when they couldn't sell it, they called me to see if I wanted to pick it up.  Free.  The third was a desk which was on loan to the local historic house, where it was stored in the attic office of the caretaker.  I was asked to provide a proposal for repairing this desk in 2010 and forgot about it.  Last week they called and said it had to be out by that day at 11:30.  At least that one will make me some money.

All of these desks have one problem in common:  The tambour roll is messed up.

What people don't know about a tambour desk, like a roll top, is that it needs to be used often.  When the roll is opened and closed regularly the canvas bends at each strip and flexes evenly.  When the roll is open and left in that position for a long time, there is a stress on one strip only where the sharp bend in the roll occurs at the back of the inside rack of drawers.  That one strip will then probably tear the canvas the next time it is moved.

People often try to repair these rolls with contact cement, not knowing what glue to use.  The results are predictable.

This is a typical case where the repair was made with strips of canvas glued to the old canvas with contact glue.  It did not work.

I have a system to reglue the canvas backing on tambour rolls and it works every time.  In fact, my research proves that the original makers of these tambours used protein glues modified with urea to extend the open time and provide more flexibility then hot hide glue.  That is why I find Old Brown Glue to be not only the perfect glue for this repair, but as close as possible to the original method as you can get.

I place a sheet of 3/4" plywood on the bench and clamp some strips of wood around the outside of the strips.  Make sure you are at 90 degrees so the roll slides nicely in the cabinet.  Use some weights to hold down the center of the strips and clamp some extra wood on each edge to hold them in place.

Now you can use a belt sander, with a coarse belt, to remove all the glue and canvas from the backs of the strips.  Make sure they are clean, sanding across the grain.

Take some Old Brown Glue and warm it up in a water bath.  Pour it on the strips and use a short hair paint roller to spread it evenly around.

It should look like this:

Get some heavy canvas, like you would use for a sail boat.  Cut a piece to fit the area and pour on the glue.

Spread it around evenly with the roller.

Now place the canvas, glue side down, on the surface of the tambours.  Use your hands and a veneer hammer or other roller to even out the canvas, pushing the excess glue out to the sides.  Clean up the excess with paper towels and a wet sponge, using cold water.

In simple terms, you are using the basic hammer veneering method to lay the canvas on the strips.  However, not a lot of pressure is needed, as it is working with wood veneer.  Just enough to even out the fabric and push the extra glue to the edges.

This is what it should look like when you are done.  The strip in the center, with the weights stays in place, and there are two strips of canvas which will hold the tambour together.  Let it sit overnight before you try to remove it from the plywood form.  You will find that some of the glue has leaked through the strips where there are gaps.  This is not a problem, since Old Brown Glue cleans up easily with cold water.  Just work a sponge between the strips to wipe off the glue.  Do not use too much water or you risk getting the canvas wet.  Just clean the wood with a sponge and paper towels.

One detail.  These tambours generally have a first piece (with the handles) and an end piece which are thicker than the strips that make up the tambour.  You need to glue these end pieces in a separate operation, after the tambour is assembled.  Be sure to allow surplus canvas at each end to make it possible to attach these thicker pieces.

By the way, does any one want a nice American Oak Roll Top Desk?  The roll works fine...

Thursday, November 15, 2012

Good Press Always Helps Ego

Over the years I have had the pleasure of being interviewed for different publications.  It is always nice when they act interested in what I do for a lifestyle.

As a person with a diverse background that includes journalism, I am fascinated by the specifics of how the interview is translated into notes which are then written out into a story line, which is then edited to fit the space, and matched up with a copy reader who thinks up some clever headline or kicker.

Sometimes it works well and sometimes I wonder who they were talking to when they got the facts, since it doesn't sound like me.  But, like they say, any press is good press.  Just spell my name right.

One of the national publications for the wood industry is Woodshop News.  I get this magazine free, like most woodworkers, and am amazed by the growth of the industry over the years.  I remember when the newest table saw or blade was hot news.  Now, when I look at the pages, I see machines that are the size of a small house and cost six figures to purchase.  I have no idea what these things do or what I would do with them, but they are fun to look at and wonder...why?

As I look up from the magazine, my head full of futuristic visions of the "modern woodshop," I focus on a beam of sunlight landing on my workbench, telling me I should put away my chisels and smoothing plane and get to work.  I think to my self, "A Roman woodworker would be right at home here."  I am a Luddite.

Anyway, from time to time the editors at Woodshop News contact me for a story.  I can only imagine that they look at their demographics and decide that they should include some old, traditional woodworking character who still lives in the past, to balance their general mix of power tool articles.  So, I was pleased when they sent Jennifer Hicks to interview me a few years ago.  She was pleasant and interested and spent a lot of time listening to me talk about myself.  One thing I have no problem with is talking about myself, as my wife knows too well.

When the article appeared in the magazine I was impressed by the way she presented my story.  It was extremely well written and included many of the important stages of my career, in a simple story line which was easy to follow.  I enjoyed reading it and, at times, had to remind myself that I had actually done the things she said I did.  After all, some 40 plus years "at the bench" can seem like a lifetime.

This blogging experience has required a long learning curve for me, so I am just now figuring out how to post these things.  Look for more links and videos soon, now that I can do this.  What fun it is sharing these "personal" insights with anyone who wants to take the time to click their mouse.

Here it is:

Woodshop News Article

Thanks for visiting!  Thanks also to Tod and Jennifer at Woodshop News for their interest!

Tuesday, November 13, 2012

A Tool You Don't See Everyday

If you have spent the time to read my early posts on this blog, you know that I first got interested in antique restoration by visiting an 80 year old upholsterer from New York and watching him work.  The way he manipulated the materials was fascinating.  His workshop was just around the corner from my house, and I would stop by just to sit and watch him do his job.

He was at the end of his life and career, but his hands were amazing.  They were huge and strong and looked like they belonged to a much younger man.  The way he would stretch the webbing, spit some tacks and sew the springs in place was like music.  A constant and fluid movement of work, without any wasted effort.  He would take several strands of Italian cord at the same time and tie the coiled springs into position, pushing them down with one hand while he quickly tied the cord into knots with the right.  Eight knots per spring.  I remember him telling me that "some guys only use 4 knots, but that won't hold long."

The most wonderful part of the job was working the horsehair into its place, stitching it perfectly in place to form the appropriate support and form.  He would pull and pick the hair with both hands so that it resembled a hairstyle from the 1950's, sitting up some 8 inches in the air.  Then, when the upper burlap was tacked in place and the final stitching was done, it pulled down magically into a firm support which was only a few inches thick.  Pulling the tufting twine over a hard cake of wax, he would use either a large curved needle or a double pointed long needle to work along the edge, stitching different rows of twine to properly shape the hair foundation.

Most workers these days don't even know where to get horsehair, and, if they had some, wouldn't know what to do with it.  Foam has transformed the trade.  I don't even want to talk about using staples.

From time to time I will get a call from a client who wants to get rid of an old horsehair mattress.  They know I can use it and don't want to just throw it away.  Years ago there was a good business in the East Coast cities where traditional mattresses were made by hand.  These mattresses were expensive and time consuming, and consumed a lot of horsehair.  Again, foam has replaced this work, and these mattresses have no value.

However, I like to recycle them.  I follow a process that allows the hair to be used again safely.  First, I have the mattress fumigated for 48 hours in a chamber using methyl bromide gas.  This kills all the bugs, if they exist.  Then I open the mattress, and remove all the twine and any cotton batting, separating the hair.  This hair is placed in a large clean plastic trash can and washed with Tilex.  Then the hair is placed on a long rack with a wire screen to drip dry in the sun.

When dry the hair needs to be pulled apart and the perfect machine for that is a "cardeuse."

Not everyone has one of these available.  Generally, they are found more often in regional festivals in rural parts of France.  Sometimes in museums of trades.  Google "cardeuse" and see for yourself.

My first experience with this tool was over 30 years ago.  There was another upholsterer in town who had a similar machine, but it had a large drum studded with sharp spikes and the bed was also studed with spikes.  By turning the handle the drum would spin at a large rate of speed and you would feed hair into the spikes with the other hand.  It was like one of those chipping machines that eat trees.  Scared the crap out of me.  Out the other side of the drum the hair would fly in all directions, filling the room with horsehair.  What a mess.  I immediately thought I would like to have such a tool, but he refused to even consider selling it.

This particular cardeuse belongs to a dear friend of mine, who also graduated from ecole Boulle.  She moved to San Diego and practices traditional upholstery out of her home.  Last week, when I paid a visit to see her, I noticed that her tool needed a little work.  Since I would like to use it, she gladly let me take it for repair.   Note it was made in Paris, probably in the 19th century.

The worker sits on the bench and moves the sliding arm back and forth.  The bed of the tool has lots of iron spikes in rows, bent into hooks.  Half of the hooks go away from the worker and half go towards the worker.  The sliding arm has a ratchet system to raise and lower it relative to the bed, depending on the type of hair being carded.

The sliding arm has a similar arrangement of spikes, which are in rows that pass through the rows of spikes on the bed.  This action, you can imagine, shreds the hair completely.

So, I sit down and start putting clumps of hair into this machine and moving the arm back and forth.  It is a very interesting pastime.  Hair goes everywhere.  You are constantly reminded about the dangers of the spikes.  There is no temptation to daydream while you work.

Lockjaw is not a pleasant way to go.

POSTSCRIPT:  The internet is an amazing system for connecting like minded individuals.  I have a friend in Belgium, Filip, who is an ebeniste and marqueteur.  He took the time to travel to San Diego and visit my studio, which was valuable for both of us to share our common experiences.  I had no idea he was into upholstery.  After this post, he sent me an email telling me that this machine is missing an important part: the safety guard.  Kind of like a table saw without the guard.  As I do not want to be the cause of any injury which may happen by some other person building such a machine without the safety guard, I am adding this photo he sent me to show the part.  It is a bar, held by metal straps which prevent the user's hand from getting too close to the spikes.  Very interesting!


Sunday, November 4, 2012

Typical Marquetry Restoration

I really enjoy working on period marquetry surfaces, in particular those made with sawn veneers before 1800.  The quality of the materials, range of exotic materials used and, most importantly, the thickness of those materials make conservation and restoration of those surfaces more successful, when you know what you are doing.

Last week I started the restoration of a marquetry panel on the base of an English tall case clock, made around 1700.  This clock, like most of those clocks from that period, had lost its feet along with the lower 6" of the carcase, including the side panels.  When it was last restored, in the 1920's, in London, the worker removed the surviving marquetry from the lower part of the panel and replaced the pine board underneath.  Then he replaced the marquetry surface as best he could, saving most of the elements.  He also replaced both side panels of the base, and added a double molded base where the round feet were.

Inside the case, I found a lot of powder post beetle damage, so I had the clock fumigated by a professional in a chamber for 48 hours with methyl bromide gas.  Methyl bromide gas is the best way to guarantee full kill of the eggs, as most other fumigants kill only the adult and larvae, leaving the eggs to start the deadly process over once they hatch.

Here is the clock, with the sides removed.
Here is the face of the panel, showing the problems caused by substrate shrinkage.  The lower piece which was added in the 1920's has pulled away from the panel, and there is a lot of wood loss due to the bug damage.  Much of the marquetry surface is loose, as the glue has dried up, and the only thing holding these pieces together is the mastic and surface dirt and finish.
First I carefully removed the panel from the clock, so I could work on it.  Now you can see the condition of the marquetry and finish.
On the back you can see the loss of wood, as well as the newer lower board.  There were also two small pieces of wood applied by the repair man to old the cracks together.  They didn't work and were easily removed.
A close look at the restoration effort by the London worker in 1920 shows his technique for saving the marquetry surface.  He soaked off the elements with heat and moisture and saved them.  However, the background ebony was damaged and lost.  He replaced the background with a similar dark wood but was unable to properly cut in the cavities for the original inlay.  He used various chisels to carve out larger cavities for each of the elements and then filled in the surround with a dark mastic, which has now cracked.

I first worked on gluing the substrate boards back together.  This required cleaning old glue and dirt from the joints, using a toothing plane to prepare the edge, and gluing the three boards back together.  This also required a slight adjustment of some of the surface elements, as the substrate was no longer the original size, but had shrunk across the grain, as is normal.  Once the substrate was stable I turned it over and started working on the marquetry itself.

I was fortunate to be a participant in an international group of marquetry restorers in Paris during the early 1990's.  We called our group ADEN, which was a combination of the Musee des Arts Decoratifs de Paris and the Ecole Nationale Superieure Des Technologies et Industries du Bois, located in Nancy, France.  We did a lot of research on modifying protein glues, age testing, rehydrating old glues, and other specific problems related to conserving old marquetry.

One of the papers published in March 1997 specifically discussed this problem of the clock:  Amelioration des operations de recollage des placages et de redressement des panneaux-supports lors de la restoration de panneaux decoratifs.  Short translation: how to restore old marquetry panels.

Out of this research came the idea to make and modify protein glues, which I used to develop Old Brown Glue.  Although OBG is now sold nationally and used for a wide range of woodworking projects, I developed it originally to restore marquetry, which requires a long open time and deep penetration properties, as well as the ability to rehydrate and bond to old protein glue itself.

The first step is to place paper towels on the surface and add clean distilled water.  Watch and wait a few minutes or longer for the water to soak into the mastic and under the loose elements.  When you can see that the mastic has expanded and is raising up from the surface, you stop and remove the paper towels and surface moisture.  Then you flood the surface with Old Brown Glue and rub it into the marquetry.  Be careful to hold down all the loose elements while at the same time pushing the glue around, allowing it to suck under all the loose edges.


This method is usually done with the finish intact.  It is not necessary or desirable to remove the surface shellac or finish for this to work.  Note that the glue will penetrate only where the finish is damaged or lost, and only where the marquetry elements are loose or missing.  That is one of the neat features of this process.  You can conserve the original finish, if it exists and still reglue the marquetry in place.

Note I am holding down the floating loose elements with my left hand fingers while I am rubbing the glue over the surface with the right hand.


At the same time, I have heated an aluminum plate on top of a kerosene heater.  I place two layers of clean newspaper on the plate and the lay the marquetry panel glue side (face side) down on the paper.
The heated plate cannot be too hot.  If it burns your skin it will burn the glue.  150 degrees maximum.

Place the heated plate with the panel into the press as soon as possible.  I use gloves so I can hold the plate.

Place some boards on top and press.  Leave overnight.  Clean off the paper with cold water.

The next step is to create all the missing elements of the marquetry.  For this, it helps to have a French chevalet to accurately cut the elements, using sawn veneer that matches the original species.  There is a neat trick I use which works perfectly to capture the shape of a missing inlay piece.  I use thermal FAX paper, which is nearly extinct, since all modern fax machines are paperless.  I have a large supply of thermal fax paper on hand.  Place the fax paper over the missing area and burnish it with a hard smooth tool.  With experimentation you will find just the right tool.  Be sure to tape the fax paper tightly in place so it doesn't move.  After you capture the outline of the element, you use a light table to transfer that shape to a piece of tracing paper.  You cannot use the fax paper to cut the piece with the chevalet, as the heat of the blade will create a large dark shadow in the thermal paper.  Glue the tracing paper onto the proper veneer, which is held in a packet with a supporting board and some grease paper.

Place the elements in a tray, using the original fax paper as a guide so that you know where they go.


Place the new elements into the marquetry picture using Old Brown Glue to hold them.  Put again in the press with two layers of news paper and a heated plate.  Clean up the paper with cold water.


Note that there are still pieces of paper on the new elements.  This is also removed with cold water and gentle scraping.  Once the surface is clean you can begin the process of coloring the new elements to match the old.  Different chemicals, dyes and stains are normally used to balance the color and shellac is used to seal in the results.  Here is the panel during the coloring process.  It is not finished.  I will glue it onto the clock and finish all the other small repairs before I complete the polishing,  The original finish of the clock will be conserved with a French rubbing compound, called a "popote."  When the clock is done, next week, I will post a final picture.


I hope this illustrates clearly how you can approach such a project with a systematically proven process.  I am not the only person who uses this technique.  I can assure you that many workers in Europe, both in museums and private practice, are using these methods on a regular basis.  The goal is, of course, to conserve the great work of the masters for the future appreciation of collectors not yet born.

UPDATE:  Here is a photo of the clock put back together, cleaned and polished with a fresh coat of wax.